How to play ChibiChu.
Get to know the character editor, appearance controls and Studio through the project’s own Beta previews.
This walkthrough is based on project screenshots and announcements. We have not run a hands-on playtest. The sections below distinguish visible controls from unverified saving, export and device behavior.
Find your character and appearance controls.
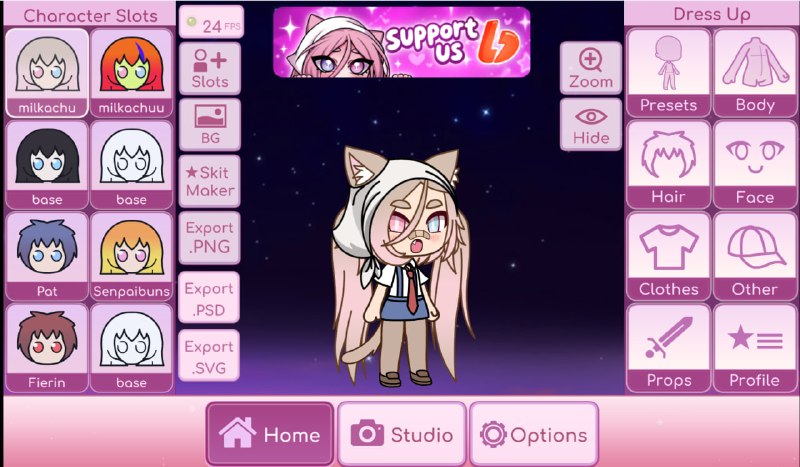
The screenshot shows a selected character in the center. The left-hand Character Slots panel contains character thumbnails. On the right, the editor groups appearance controls into categories such as Presets, Body, Hair, Face, Clothes and Other.
Use this layout as a map when exploring your copy. Start with one character and one appearance category so changes are easier to follow. The exact selection behavior and available items may differ from this preview.
Explore the eye editor.
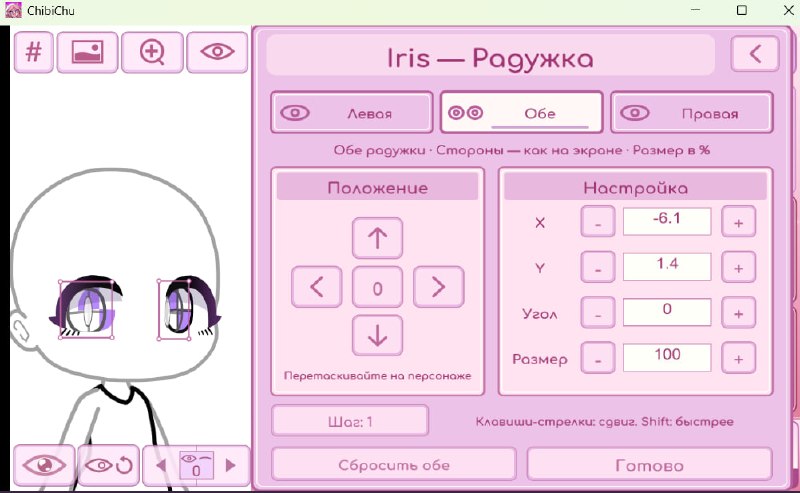
The published iris editor shows left, both and right eye selectors, along with position, rotation and size controls. This confirms what the pictured interface contains, but not the exact path used to open it.
Try a small adjustment at a time and note the starting value. We have not verified a reset or undo workflow, so this guide does not promise one. A translated label here is an explanation of the screenshot, not a claim that an English interface is available in your release.
Get familiar with Studio.
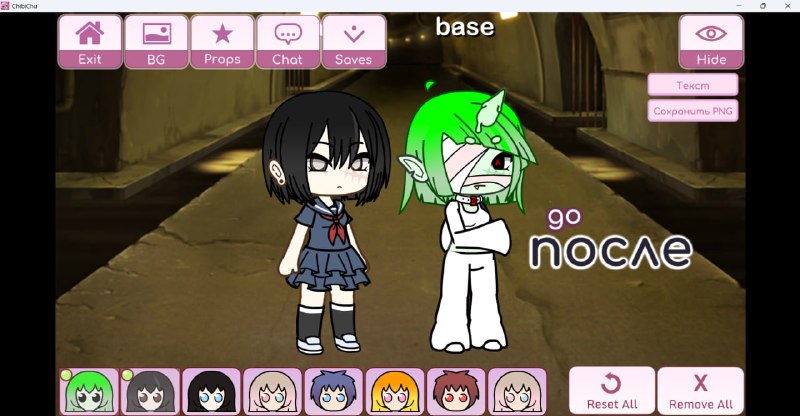
The main editor preview has a Studio tab at the bottom. The developer’s scene image shows two characters, a character strip, and controls labeled BG, Props, Chat and Saves.
These identify the areas to explore for scene backgrounds, props and dialogue. The project image does not establish the exact sequence for adding, moving or posing a character; we have not invented those steps.
Saving and exporting need verification.
The previews show Saves and export controls. Their presence does not confirm a working export format, storage location, or save migration across releases.
Before spending time on a large scene, make a small test creation and check whether you can reopen it in your version. Do not delete existing app data or replace a previous installation on the assumption that your creations are backed up.